Mast making. Reinforcing an
aluminium tube spar with a birdmouth inner plus solid blocking.
I’ve been given a mast blank, a 5m long x 75, od, 5mm wall thickness chunk
of T6 temper aluminium tube. It was
bought to be the main mast for a Pathfinder, but life got in the way of the
builder completing the project and he very generously donated it to my
cause. (Thanks so much Brian, very much appreciated)
It’s a little light for the unstayed rig on the longer, but
slimmer, water ballasted Long Steps, so I’m reinforcing it through the mast
step area and up to where the boom of the balanced lug main will be by making a
hollow wooden tube that is a close fit inside, that takes care of the worst of
the bending stresses where it passes through the top step in the roof of the
“cabin”.
Its also a little bit short, so I need to make a wooden
plug to extend the top end of it, and
while at it will put a tapered section on to get the halyard well above the
yard and to fly the wind direction arrow up out of the turbulence of the
mainsail.
Besides, it looks nice.
There has been a little discussion on my facebook group
about birdsmouth spars, so, here’s an opportunity to show a step by step “how
to”.
The reinforcing plug at the lower end is 1600 mm long, sized
to fit inside the aly tube, and 250mm of it extends out the lower end to help
give the spar a bit more length. That
section needs to be the same diameter as the outside of the aly tube, 75mm
instead of the inside being 65mm.
Step one, off to Duckworksmagazine archives, and look up the
birdsmouth spar calculator, http://www.duckworksmagazine.com/04/s/articles/birdsmouth/
I wanted to have some spare thickness, especially in the
lower piece so where I’d brought the diameter down to the ID of the aly tube,
I’d still have enough to make a good contribution to the stiffness of the spar
through that area, so went for a stave thickness of 22mm, that for the top and
the bottom pieces.
It coincided with the thickness of a stack of planks I had,
as with the length, they were pretty much made for the job at 140 x 22mm x 1600
long, or should I say the job was made for the materials available at the time.
I use 8 sides in most of my birdsmouth spars, I’ve a very
good sawbench, (MBS 250, 3 hp, good
machine, often have other brands names on them) so I design my work around
that.
Staves were 32mm x 22 mm, with a 45/45 deg vee in one edge,
and that, with 16 staves took me a while to first straighten one of the rough
sawn edges, poke the planks through the planer, then the other side to get them
to the correct thickness then back to the sawbench to rip the planks into
staves at the required width.
Next, set the saw blade over at 45 deg, run some scrap to get
the blade height and the fence set right, and slide the staves through, one
side, then swap ends and do the other side.
Nice little triangular pieces of waste and a lot of sawdust.
Some people will run these vee shapes with a router in a
table, but as you can see, a sawbench with a good fence and a sharp blade does
a perfectly adequate job, and much quicker.
Once done, being that these planks had been outside under
very indifferent cover for two years, I stacked them with fillets ( stickers in
US terminology) between the layers to help air circulation and left them for a
week to get rid of excess moisture.
I don’t know for sure, but I think that these planks are
American Southern Yellow Pine, they arrived here in NZ disguised as a shipping
pallet. I was pleased to have them. (
Thanks Bill) The wood is fairly light
weight, but tough and strong, glues well, is a bit tetchy to plane if you hit a
knot or some reverse grain, but a very sharp plane handles it pretty well.
I tested the moisture content using the “match” test. That’s a goodie if you don’t have a moisture
meter.
Goes like so. Put
half a dozen matches along the plank, heads in contact with the wood, in the
shade. Wait overnight, and if in the
morning, you can strike them and get a light, the moisture content is low
enough to glue.
Any dampness, and the matches wont light.
Having made up all the staves, the assembly jig was next. That’s simply a slightly oversize half circle
cutout in a plywood scrap at each end of a support, like so. The cutout in this
case was 80mm, it needs to be just a bit oversize to accommodate the way the
staves fit together.
In the lower end of the lower section, there is a hardwood
“blocking”. That’s a solid piece that
takes up all the space inside, in this case its 550mm long, cut square to the
size of the inside space across opposing flats, then cut at 45deg on each
corner to make eight equal sides.
That piece is Australian Jarrah, seriously hard wood, very
strong, glues well.
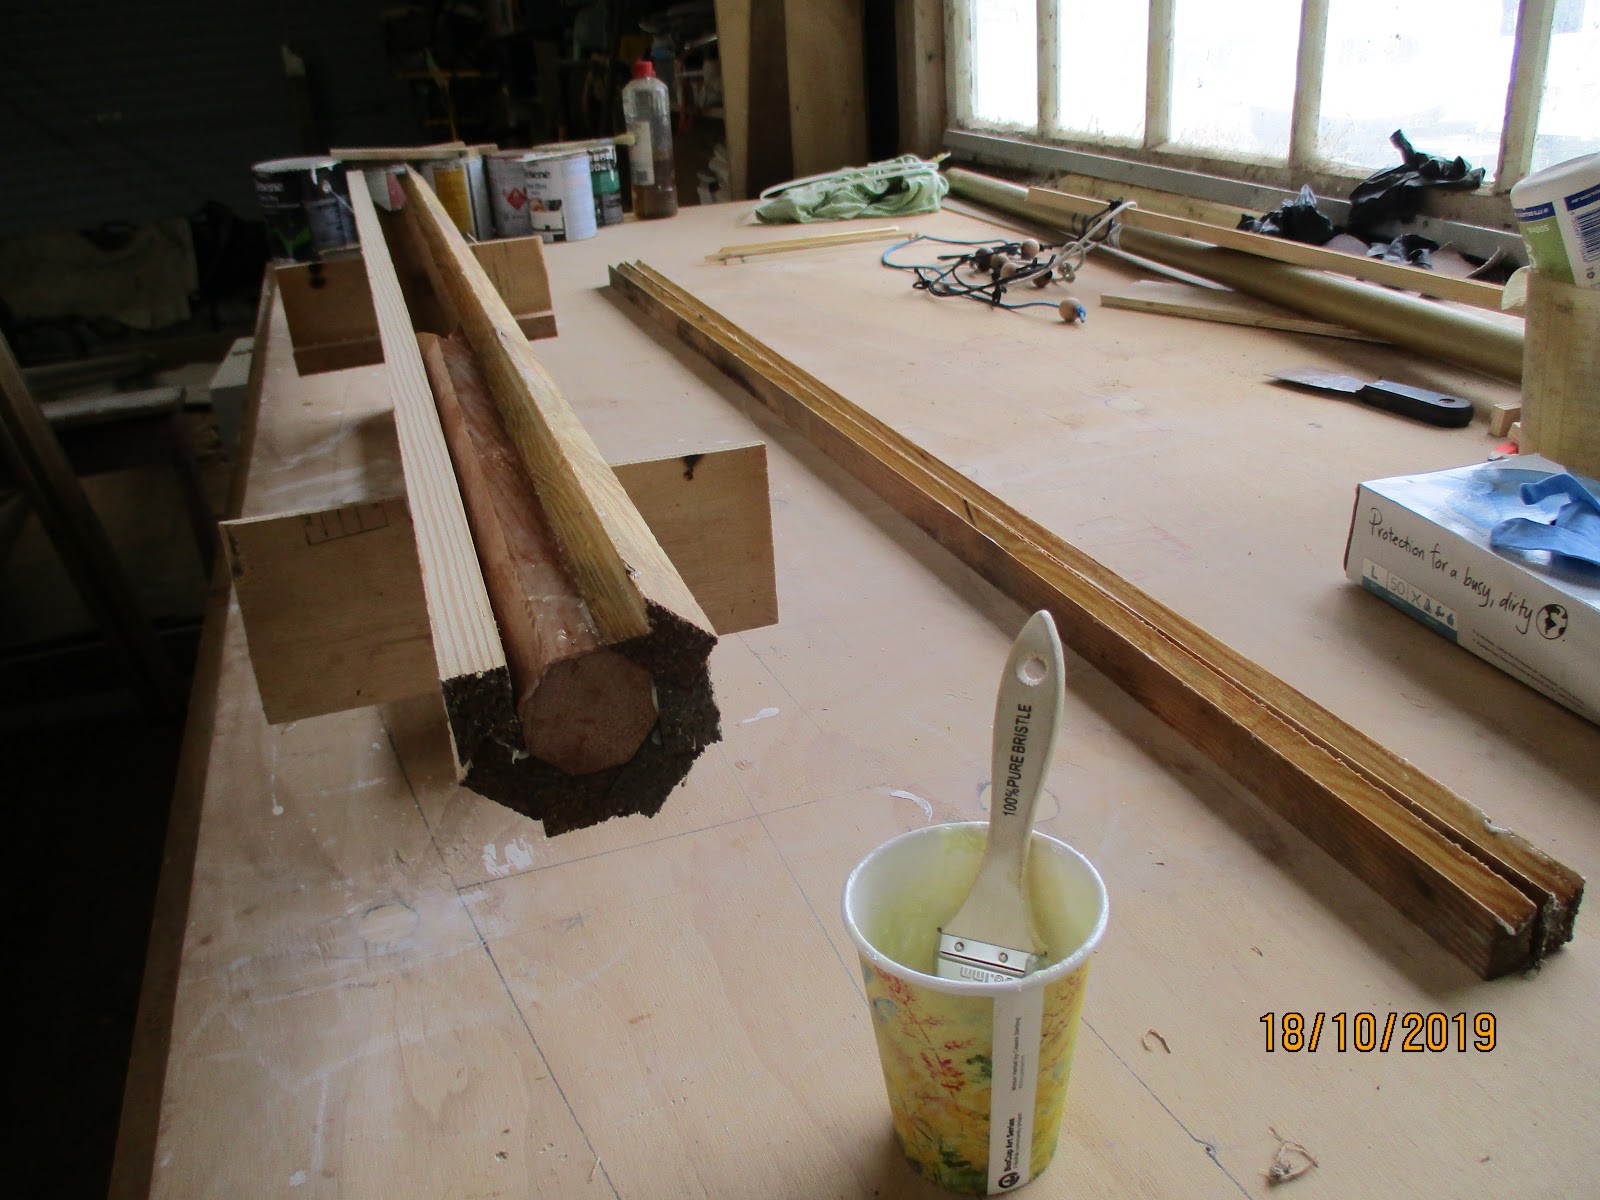
Same with the top end, the hollow section needs “blocking”
through the area where it sits into the aly tube, and a bit above where the
halyard blocks are to be bolted in. That
piece is spruce, and you can see in the pic where I’ve cut away the top end to reduce the “stress riser” where
the section changes.
To explain that, a sudden change in the strength of a tube,
or a beam or whatever, from one strength to another , in this case where the
internal reinforcing suddenly stops, causes a much weaker area than either of
the strengths each side of it. Its know
in engineering terms as a “stress riser” and that odd shape that you can see in
the pic is a good way of ameliorating that problem.
Now, its about time to lay the spar up.
This procedure is the same whether it’s a short item as
these are, or a full sized mast for a much larger boat, or anything in between.
I’ve made up shock cord lashings, pieces of car tyre inner
tube with toggles, or suchlike will do.
Use lots. Have them ready to hand before you mix the glue.
I had at this stage tried a dry layup to check that the jig
was right, lined 8 of the staves up ready
and it was time to get on with it.
Mix the glue, not so much thickener in this, it needs to be
brushable, almost a syrup consistency rather than the peanut butter thixotrope
that we usually mix with our epoxy glues.
Brush the glue in, in this case it was 5 pumps each of
hardener and resin with the WEST system pumps, well mixed, glue powder added
and well mixed in, and at it with the brush.
This was a 30mm chip brush, cheap enough to throw away later, it
actually costs less than the solvent you’d use to clean it so in the bin it
went when the job was done.
Brush coat all of them, then four sides of the blocking piece.
Drop one stave into the jig, slip another into the notch,
then a third, sliding the assembly down and around as you do so so its sitting
in the bottom of the jig.
Drop the blocking piece in, making sure all the ends are
flush, then coat the top four sides of the blocking, and carry on with adding
staves until the last two are ready.
Drop the second to last one in but leave its vee edge
sitting up, you need to drop the last one into the vee of the one on the “other
side” then lower both down so the vee engages with the square edge of the
other. You cant get it in otherwise, and
its not possible to slide it in from the end.
Practice this on a dry run, do it a couple of times if
you’ve not done it before.
Massage the assembly into shape so all the joints are fully
engaged, then tie the assembled spar together by wrapping your shock cord ( or
whatever) ties around it, work it over again to make absolutely sure its all
properly clamped, then go away and leave it until tomorrow.
What you get when you come back is a peculiarly shaped
thing, that will need a lot of work with a plane and sandpaper, and there are
plenty of articles around that will explain that, but suffice it to say that
you’ll make a lot of shavings, and that long strokes, changing the section from
the odd shape to 8 sides, then 16 sides, then 32, then round, is the way to
go.
The part of the section that is going inside the aly tube
doesn’t have to be finished to a high standard, its going to be completely
smothered in epoxy glue before its slid into the (cleaned out with an acetone
soaked rag on a broom handle ) aly tube, so with the aid of a template, a dead
sharp no 3 Stanley plane and an angle grinder with a 40 grit disc on it, I made
a big heap of shavings and dust. It took
a good hour and a half to get that fitting, patience is a virtue , as is a pair
of strong arms.
So there it is, I’ve some work to finish the lower end, I
need to cut the tenon that fits into the lower mast step and put a couple of
screws countersunk into the aluminium to hold the woodwork in place, just in
case the epoxy doesn’t stick, and its there to be a filler more than anything
as the loads are all sideways, and that end of the job is done.
I’ll be back in a day or two with the top end.
Below, I've posted a series of pics that show the whole operation.

Test cuts, note the blade of the saw tilted, the position of the fence and the height of the blade.

16 staves, milled to thickness and all cut to width, the vee cuts done, drying out to make sure that the glue will take.

45deg cuts to make 8 equal sides.

The internal plugs, the reddish one is Jarrah, high strength but heavy, goes in the butt end of the mast, the other is spruce which goes in the top section. They're sawn to the shape of the inside of the 8 sided birdsmouth section spar pieces.

This odd looking end cut is there to reduce the "stress riser" where the plug ends.

Second stave in place, all of them are pasted up with the epoxy glue so speed is needed. Note that I do this sort of work in the cool of the early morning to give me more time.

Thats three staves in place, now to slide them down lower in the jig, at this stage they don't have to fit perfectly, the final assembly with the shock cord clamps will pull them together.

A nice close fit.

Half the spar laid up, and the "plug" being fitted in.
One at a time, laying them in over the plug that will reinforce the mast lower section.

Last stave being slotted in. The last one requires the previous one to be eased out so the two can fit together then be pressed back in.
All glued up and the shock cord strapping holding everything in place.

All strapped up. I'll leave this for 24 hours to make sure that the glue is dead hard.

Time to make shavings.

More shavings.

Template being used, the open semicircle on the right is the template for the outside of the aluminium tube, the one on the spar is the smaller diameter for the inside.


Nearly.
Almost there. Just some fine shavings and a bit of sanding to do.

Hey, it fits! Now to pull it out, clean out the inside of the tube, coat the wooden section with glue and slide it back in with a couple of screws countersunk in, to hold it. Just for insurance.

The pile of shavings was about double this by the time I'd finished. It represents a certain amount of sweat, but it was a fun job. One to go.
Great job and terrific write up. For the wood to alloy joins do you use the same glue mix up or would West Systems 610 be better if you had it at hand. I’m thinking more about the slight flex potential at the upper joint.
ReplyDeleteI'm trying to eliminate even the faintest trace of movement there Simeon, the lower one is not an issue as there is over a metre of it inside the aly tube, and its a pretty firm push fit in there so not much potential for movement, the top one will have around 350mm inside the tube, and will be epoxied in using standard epoxy glue. Sadly we cant get 610 here unless we indent a carton of the stuff, so its the ordinary mix. But with a few countersunk screws to help that will work fine.
DeleteI thought you may not have access to 610. Strange...
ReplyDeleteI’m sure WS 206 will work just fine.