Tuesday, October 25, 2016

Its nearly summertime here.

Supporting oneself with the income from plans sales is not easy.  I watch the others in this field and note that pretty much all of them do the design work and plans sales as either part of a larger business that might include doing survey work, or boatbuilding, or something completely different.  But other than living a very simple life, getting the utmost value from every dollar spent, its not really a living.
So I do other things as well as draw and build boats.

I spent many years selling, installing, comissioning and trouble shooting heavy sawmill and wood processing machinery.  I managed a sawmill for a while, ran quality control audits on some companies who made structural laminated wooden beams, and through all that built up a good knowledge of the principles of woodworking machines, how they function and how to fix them.

That’s how I earn my extra cash, that plus my Government Superannuation allows me to travel, to drive a decent vehicle, and to have some choices in life. It does though burn up time that I'd rather spend on important things like boats and boating.

Just recently, the company that I contract to for machinery repairs ran a notice in their monthly customer newsletter that they had this service available, and there has been a good response to that, its kept me out there swinging my spanners and hitting things with hammers rather than writing my blog, so what I’m saying here is “Hey,  I’ve been busy”.

Boatbuilding, and even drawing has been slow of late so the engineering, although time consuming is a nice little business that makes a difference for me.  It’s a distraction from the important stuff though, and I’m getting withdrawal symptoms.  I’ll be drawing this morning, out in the workshop this afternoon  One stringer to fit and I can start fitting up the lower plank on Long Steps. 

That stringer has to go in, and the plank on so I can determine the shape of the (off) centerboard case, it slots through the join where the plank butts up against the bottom panel, remembering that this boat doesn’t have a true keel, its got a long narrow panel, flat from side to side and curved from bow to stern. It’s a big timesaver in that there is no keel structure to build, and the framing is “egg crate” style on top of that, stringers wrapped around and planking applied.

So I’ll be out there this afternoon, its “engineering tomorrow”, and I’ve a job that will take me to Whangarei, a bit over an hour away, on Wednesday.  That gives me an opportunity to drop in and see Annie Hill and how her new ship is coming along.  Its upright now, good progress.

>>>> A few days along from the above.   I’ve fitted and faired off the lowest stringer both sides. It’s a fairly heavy one at 25mm x 30mm, it has to lie fair across some well spaced frames and the heavier section is needed to do that, plus its got a near 80 degree twist from the midships section to the stem so there is quite a bit of material to be planed off.
Done that too, and am busy getting the plank shapes off, that’s not hard, it’s a matter of taking a slice off the side of a sheet of plywood then clamping it into place, tracing the lower edge and cutting, then doing some trimming to fit, and when that edge is right the top edge is simply traced off the top of the stringer and cut.

I need the full plank shape for the plans, so I’ve begun by making the first piece, that’s 2.3m back from the stem, there will be another length from the stern forward and a short length to bridge the gap between the two.  I’ll be making a simple scarf joint with a butt bock behind to hold them together, then taking the full plank off, fiberglassing the inside to beef up this plank. 
It will be glassed outside as well, and the join between the bottom and that plank will be taped with 150 wide double bias tape, the reason for all this is that when beaching the  boat there is a lot of stress on this area, so rather than have a hole punched in it, I’m adding strength where needed.

That first section, the one that many people find quite challenging due to the combination of curve and twist has gone on easily, the long slim boat is easy to lay plywood around as there are no hard curves and that twist up to the stem is spread over the first 2.5 metres or so.  Not a big deal at all.

At this stage I’m leaving the mizzen mast box just dry assembled, until I have the masts I wont know what diameter hole to put through the partner block at top and bottom so it has to wait.  It wont be hard to access later on so that wont be a big deal.

I did though start on fitting the rudder gudgeons and pintles, drilled the holes, 20mm, way oversize, masked them off and filled them with epoxy filler. They’ll be sanded off smooth and flush then redrilled to take the bolts, and countersunk to take neoprene “O” rings smeared with anhydrous lanolin to seal them off.
If I hit something with the rudder the shock wont then break the seal and let water in.

 Spending a few hours out there working on the boat is good for the soul and the sanity. I should do more of it.


Sanity, until Sunday last I’d only sailed SEI on the river, its narrow and the currents run really quickly so its tack, tack, tack, maybe two or three minutes apart.  Not enough time to get a real feel of the boat, to play with sheeting angles and tune the rig, move my weight around and see what difference it all makes.
Friend Blair, and new friend Charles were going out in the “real” sea for a sail last Sunday, so I wheeled SEI up the track from the dock to the carpark. Its still too early in the season to get the pickup and trailer down here, wet and soft, I’ve been bogged twice and don’t want to do that again so it was muscle power to get her up there.
Its very steep that track, I gave up carrying her before I got halfway up.  80 kg and nearly 5 metres is a big lump to carry on ones own.  So I put a sausage fender under the bow, pushed her along to the balance point, put a second fender under the bow and pushed, and so on. 
Hoisted her up on the trailer, an ordinary garden trailer with a bit of padding, strapped the rig on and away we went.


Charles with his leeboard "Rogue" still on the trailer, Blair on the beach about ready to go, me heading on out.  You can see the lighthouse off in the distance on the left, its the vertical thing nearest the left of the picture, about 5 or 6 miles I think.  A nice sail on a nice day.
For those who dont know it, thats Rangitoto Island, a, hopefully, extinct volcano that lies across the mouth of Auckland harbour, it was last active somewhere around 900 to 1000 years back. Fingers crossed.
Pic by Emma 


If you’re into Google Earth, we sailed, Blair in his Saturday Night Special and I, from Narrow Neck Beach in Belmont on Aucklands North Shore to Rangitoto Light and back. Downwind in light conditions, and back with just a little more breeze.  Charles stayed nearer the beach, but took some pics of us as we neared him. Thanks Charles.
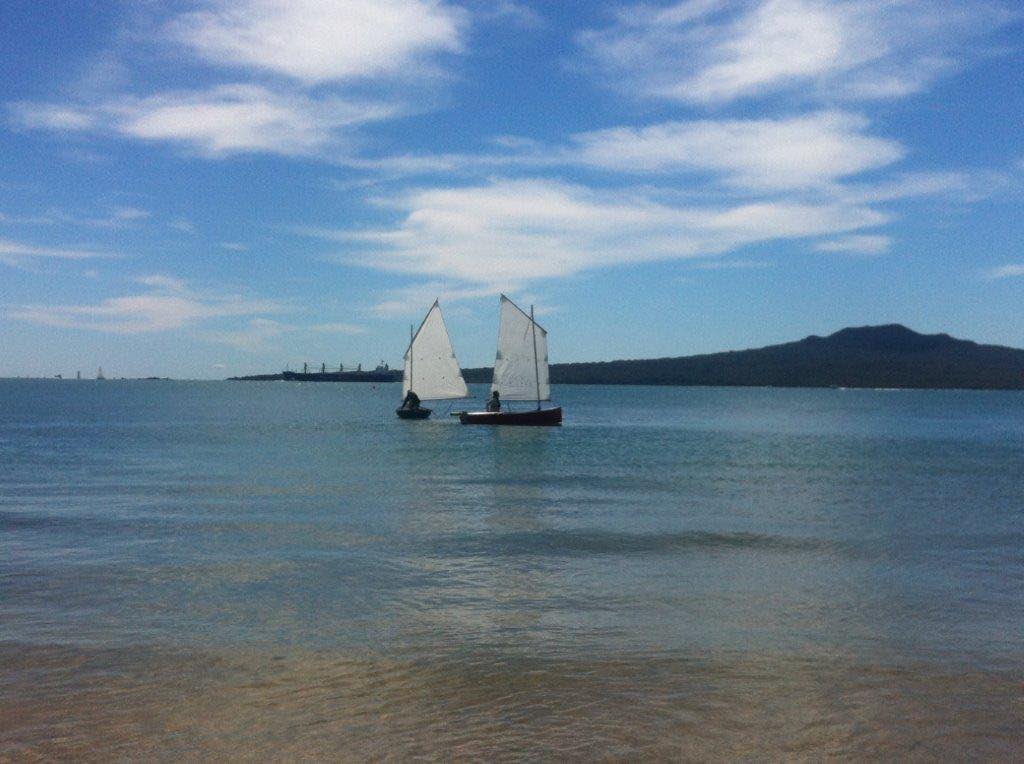
We're off.  You can see that there is a lot of traffic out there, thats the main channel, handles all the shipping plus there is a lot of recreational craft out there.  Labour weekend is the last weekend in October here and is generally thought of as the beginning of summer.  This day was about 20 deg c, very pleasant.
Another pic by Emma. (Thanks too for the picnic lunch, much appreciated) 

Performance wise? I sailed away from the SNS downwind in light conditions, then Blair sailed past me upwind. I was playing with the trim and sail shape, made it back to the beach before he did but he had been having a relax and not paying attention, plus I was working both tide and windshifts so who knows. In any case both boats are performing pretty well.

Both Blair and I wanted to know how our boats behaved in a capsize, so he hauled “Tomorrow” over. He reports that she didn’t want to capsize, took some effort to get her over.  She floated high and stable but there is a lot of water to move to get her dry,  Watching him right her it was evident that she came up easily and the boat was stable enough swamped to climb over the side so she’s about as I expected.  Good! No worries there.


SEI is not quite so good, I knew she needed more bouyancy, have even mentioned that in the building guide that will be with the plans, recommending that polystyrene blocks be fitted under the centre thwart.  But she was unwilling to tip over, took almost all my weight standing on the rail to get her to lie down on her side. I was able to right her easily, but she floats a little too low to board and bail her so today I’m cutting and fitting those blocks.

Note, did that this afternoon. 

Its our “mini raid “ this weekend, starting mid afternoon from Sandspit, out to Kawau Island, back on Sunday. Details on Facebook, the Dinghy Cruising NZ Facebook page.

I’m very much looking forward to it. Best get to work on that boat, provisions to go on board and my camping gear to organise.


Notice.  Friend David Jasper Robertson had a nice website going a year or five back, it got a bit much, life got in the way and he let it slide. But he’s back again, with a slightly different focus this time, more relaxed and as a story teller rather than as the “authority who tells people how it is”. 

He’s only just got started, but there is some content there which you might find of interest, here’s the link.


Sunday, October 16, 2016

Report on Saturday Night Special.


A while back I drew up a boat I called the “Saturday Night Special”.  A reference to a cheap throw away weapon used for a single job.  The boat was intended for events such as the Texas 200, was to be a quick build and would have good performance with one or two aboard, and to handle the often very windy conditions that prevail there.

There have been a dozen or so of these built so far, all of them built and finished much more nicely than the original concept entailed, and several of them participated in this years T200.

For those who don’t know it, that’s a 200 mile, five day sail up the eastern coast of Texas, camping along the way in places where one has to be completely self sufficient.  It blows, the hot desert pulling air in off the Gulf of Mexico, 25 knots plus, generally over the stern quarter is common. Blazing sun, big waves, shallow waters, mud, narrow channels, it’s a challenging event, one which attracts a good entry each year  and I’m complimented that so many have chosen my boats in which to participate.

Booby and Kirsten Chilek took their Saturday Night Special on this event, and Bobby has written an excellent story of their journey up the coast.  It’s a very good read,  you can find parts one and two here.


Heres a video shot of the boat under way, moving right along, steady and stable.


Here’s his impression of the boat itself, I'm very pleased and highly complimented, thanks Bobby.


“FINAL THOUGHTS ON THE SNS
After the way the boat performed in the Texas200, I am thoroughly impressed with this design. The boat is exceptionally seaworthy, in all the conditions we faced that week, the boat never gave us cause for concern and as the week wore on I became less concerned about what waves we might encounter in the bays.  She is very stable on all points of sail, I have come to believe that she will be quite difficult to blow over.  I have had her pretty far over and she just holds there, with the side decks, she is unlikely to take on water when heeled way over.  She is  quite capable of sailing in shallow water, this opens up so many areas that are off limits to others.  She is fast.....I mean FAST.....very capable of planing!  I look forward to getting her to do this more as I really learn this boat.  I love the way this boat is fully decked, and the front and rear storage compartments.  We had everything we needed for the week packed in there.  We could have put in more but were trying to give some nod to weight control.  The boat is light, maybe 250 pounds???  I haven't weighed it, but my son and I can lift in on and off the trailer. I also like the the fact that you can sleep in the cockpit, this is very useful when you arrive at your camp and find it less hospitable than anticipated.
As far as my sail trim problems, I have resolved most of those.  Turns out I changed too many things at once and have returned most of the changes back to design spec.  The main problem is that I just need to learn the lug rig.  Most of my sailing has been with the Marconi rig, I have some gaff experience too, but it wasn't a huge adjustment.  I know this sail is fast because Chuck Pierce has a lug rig on his Mayfly 14. I have also seen John Goodman flying along in his Goat Island Skiff, so there is nothing wrong with the lug rig, there is just a learning curve.  I feel that the curve is well worth it, because it is the easiest rig to deal with on the water I have ever had and one of the quickest to set up when you arrive at the boat ramp.  I am convinced that I could have this boat launched in 15 minutes after arriving with a little practice, this makes the boat very useable.
This is the fastest, most versatile, seaworthy, easy to use,  fun sailboat I have ever had!
And .........I got to sail the Texas200 in it, what a blast!  “


Friday, September 23, 2016

Springtime weather and other stuff. Long Steps progress, sailing SEI at last, and a nice blog to read.


Its raining.  Not a howling horizontal fire hose kind of rain like yesterday, or a misty just enough to get you wet before you realise it but an honest, steady soaking into the ground to get the spring growth going kind of rain.  All day.

I’ve spent the morning in the workshop cutting holes in my boat, making the openings for some of the 6 screw ports that will give access to the compartments under the side seats in the cockpit of Long Steps.  There are two compartments at the forward end that are divided off from the rest of the volume, those access from inside the cuddy, and I’ve put a port in each side which gives access from the open area of the cockpit at the after end.
There will also be a port in the seat tops about halfway along.  Why so many? These are long spaces, and its really frustrating to have something roll so far in that I cant reach far enough to get it.

There will be more, two in the cuddy floor, one in the cockpit floor to access the space aft of the ballast tank, and one in the ballast tank itself so I can reach in to undo the filling and draining bung, and to make an opening so I can fill the ballast compartment with a bucket, then put the port in to seal it.

Each one of these has to have a fairly close fitting hole made in the bulkhead or cockpit floor, has to have a doubler fitted behind it to ensure that there is thickness enough for the securing screws, and to make the edges of the opening stiff enough that it cant bow or buckle under the pressure of the fastenings.

That was a mornings work, leisurely work, but work.

I also started on some of the fittings.  The rudder gudgeons bolt through reinforcing pieces glued and screwed to the inside of the plywood transom, total thickness close to 30mm, and those pieces are connected to and braced by other structure in the stern compartment.  I DON’T want the rudder to come loose, so for insurance, plus making sure that water cant get at the plywood end grain I drilled the holes for the 8mm stainless steel bolts that will hold the fittings, then got in there with the little router and counterbored those holes in about 20mm at 20mm diameter, then with epoxy glue mixed with a little bit of microballoons to prevent the mix from running out, I piped them full of mix, forcing the epoxy right through the original holes as well.
I’ve over filled them so they’ll sand off flush, and will when the mix has set hard, redrill the holes.
Why?  Strength plus if I hit something hard with the rudder the shock loading wont disturb the epoxy enough to allow water into the plywood end grain.
In addition to that, each bolt will have a large section neoprene “O” ring between the transom and the fitting, said “O”ring being coated with Anhydrous Lanolin.
I’ll make a countersink in the epoxy, enough to seat the “O” ring about half its depth into the countersink, and when its compressed it will be a totally watertight fit on the bolt, the fitting and the transom.
I took two half days “off work” this week, off the engineering work that is, rigged little SEI on the first day, then was sitting watching the miserable misty rain and the very brisk wind on the estuary thinking, well, you all know the words, when a missive arrived from my friend Paul who lives just down the river a couple of miles. He asked if I was going to sail the boat today? Should he bring his camera?
Ok, it was about 15 minutes shy of high tide, there was a tiny hint that the rain would ease and being honest the gentle indirect light was near perfect for photographer Paul to work his magic.
By the time he arrived I had the boat rigged with a reef tied in, she was slid off the dock and into the water and I was away.

She sails.

The worried look was not justified. She is stable and felt steady even though the weather was not what you'd normally want on the day you sailed a brand new design for the very first time.

Sails good!

She has nice balance, accelerates well, steady and stable, carried that reefed sail in gusts of more than 30 knots ( Metservice official stats said winds up to 45 km H at about that time), she tacked reliably, tracked well and pointed up well.


I’m very pleased.


The sail by the way is from RSS Sails, its an "OZ Racer sail"  very well made, sets perfectly, seriously well priced, available here http://reallysimplesails.com/ or from www.Duckworksmagazine.com  

 Off downwind, this stretch of river is not wide enough to allow big waves to build up, but the wind is channeled along the length of the reach by the high hill on the other side from the view here.  It was blowing hard, SEI was not in the least bothered by it/


The wind had eased a little by the time this pic was taken and she was about powered up right for the strength of the breeze.  I sailed her in very light winds next day, the river being like a mirror with a few tiny ruffled patches I was coasting from one tiny puff to the next under full sail. All good. I took her out on the midnight tide last night, there is really only water to sail in for around an hour at the top of the tide and the moon was out, so I slid her off the dock and went out down the river a ways.
I might just do that more often.


I'm pleased too that Paul took pics, he’s better than good with that camera, Paul Gilbert! Photographer. Remember him if  you want pics at a special event.


Every now and again I get an email from someone who’s built one of my boats that really lifts my spirits.  I got one yesterday from Ryan and Chris about my little “SCRAPS” design, a tiny yacht tender, built from whats left from other projects, hence the name.


If you scroll back a post or two you’ll find pics of the build as well.  Nice work people, thanks for keeping me posted and thanks too for permission to link from here.


Wednesday, September 7, 2016

Howard Rice's SCAMP is in and sailing

You can check it out on the below40south.com website, that and other video clips are under the "Media" heading at the top of the home page.

He's going to be living on board for much of the next month, sailing her on Lake Michigan to check that everything including himself is all as it should be, then the little voyager goes in her crate and gets shipped south, a long way south to where we'll meet her in Punta Arenas, Chile.  We'll pull her out of the box and set up the boat and rigging, do the inspection thing with the Armada De Chile and our friend Captain Herrero the boss there.  We'll buy and prepare stores, load her up and test sail her and then, ( gulp, I'll be chewing my fingernails) will wave as he sails off into the cold grey green waters of the Straights of Magellan.
Cameras running.

http://below40south.com


Saturday, September 3, 2016

Mast box, plus some work to get SEI ready to sail.

Oh yes, and the first few days of spring.

I’ve not had much time in the workshop this week, so there has not been a lot of progress in there.  I did though have a nice three day stay with Denny and our family in Hamilton,  got to see the granddaughters, went to Oropi hot pools with the BOP group for a meal and a soak, and arrived back home to a long list of chores.
As well as catching up on customer questions and drawing work I’ve five engineering jobs on in the next four days so its going to be quiet in the shop for a little longer. It does pay well though, and thats really helpful in funding projects like “Long Steps”.

I've been able to get in there for a few hours though, used that time to build up the main mast box. Its all glued and screwed together now, there are some reinforcing pieces still to go on but this afternoon I got it fixed in place on the after face of B#2.

 This is the mainmast box. Its been carefully coated with three coats of epoxy, all the seams pre primed, and the corners filleted with a small glue fillet, the drain hole drilled and sealed, and the drain fitting screwed into the bottom the mast step box ready to put the last side on.  From here its "let the glue go off, sand its outside corners rounded and then put it in place.
The main mast step box in place, held by glue plus screws through the two layers of 9mm plywood on the bulkhead and screws through the 20x30s on each side of the vertical web / spine underneath.
There are reinforcing pieces to go in yet, plus a fore and aft beam each side at the top.  You can see the far side one sitting there ready to fit, thats not only the support for the top of the mast box but is also the deck support for the cabin top.
This is one of the most highly stressed parts of the boat, and I DONT want it to come loose. 

There will be a very similar one back between the transom and the next one forward.

I had a little win today, Dean Pannett of  http://www.nzcomposites.com  lives just over the hill from here, and supplies glass cloths, epoxy, carbon, kevlar and all sorts of stuff useful to a man buiding a boat.  His prices are great, service good, and I picked up some epoxy to keep me going.

Another interesting place, I asked Dean who in town here supplies rolled carbon fibre tubes, and was told about C Tech   http://www.c-tech.co.nz  who among other things have a standard range of carbon tubes, two of which, although they don’t know it yet, will be holding up the sails on Long Steps in a while.
I’d been told about these guys before but Deans reminder spurred me into looking for their website to see what they do.  I hope on my travels to be calling in there to check them out more closely.


On Thursday last it was the first day of spring for us here in the South and as I want to do more sailing than I got in last year its time I got on with rigging SEI. I’ve had a day off, most of the day anyway, and spent a couple of hours of that prepping the spars for SEI s rig.  Today I’ve leathered both the yard and boom, bolted on the fittings and begun lacing on the sail.
The leathering was done with an oar leather kit from Duckworksboatbuilders supplies ,  I did the oars with the original kit and that’s holding up really well, had some nice split calf ( a grade of leather, fairly light) on the shelf so used the needles, punches and thread left over from the oar kit to do the leathering job today.

White split calf leather, herringbone stitched, double cross stitched at the ends, almost decorative. This should go well with the white sail. The leather is there to stop the chafing where the spars cross the mast.


These are great kits, sometimes its difficult to find the special needles, the heavy waxed linen thread, the tallow and the leather to do these jobs, and in these kits it all comes as one, including a piee of tape measure, good clear instructions and the little punch to make the holes.  I’m a fan.

The sail by the way is an RSS sail, its the OZ Racer sail which can be obtained from Mik Storer


Or Duckworksmagazine.

Nice sail by the way, extremely good value for money.
Mik has some very helpful tutorials up on his site, very useful for setting up and tuning a Balanced Lugsail.